Efficient QR code reading with Zebra Android devices

For tracking purposes, printed labels often contain a QR code, which can be scanned using two methods on Android devices. The first method is compatible with almost any Android device, while the second requires specialised hardware with a built-in laser QR code scanner. How does the built-in QR code reader speed up the process and how is it integrated? This article will answer those questions!
How does the integrated QR code reader support your work?
As highlighted in the first part of our series, QR codes are often printed on labels for tracking purposes. The most common method of reading QR codes or barcodes is through the device's camera. There are many easy-to-integrate and highly functional solutions that you can add to your codebase as dependencies, allowing you to read QR codes using the device's camera with just a few lines of code. One of the most widely used libraries for this purpose is called ZXing, which was developed by JourneyApps. If you don't want to add a new dependency, you can write the code, depending on your familiarity with the subject and whether the project framework allows it. In most cases, it's recommended to add a dependency.
However, some Android devices have a built-in laser QR code scanner, such as most Zebra devices. The main advantage is that you don't have to rely on the device's camera, which can speed up the scanning process considerably. Remember that using the camera requires you to obtain the necessary permissions from the user - but only the first time you use it. Activating the device's built-in QR code reader with a physical button will allow you to retrieve the scanned code within seconds, as the scanning itself is much faster with a dedicated reader. A built-in reader can complete the task in 1-2 seconds, whereas a camera-based scan could take 5-10 seconds. This difference can add up to significant time savings if you're scanning 1,000 QR codes a day.
As this library is unavailable on any SDK-sharing platform, the .jar file must be downloaded from Zebra's official website. Simply typing "ZSDK Android SDK" into Google will take you to the download page.
Once the SDK has been downloaded, it must be copied to the app/libs folder. However, this is not enough to use it. You also need to add the following line to your app.gradle file:
The process of scanning a QR code
When you press the physical button on the device that activates the QR code reader, you simply point the laser at the QR code and the scan is complete. The only question is, how do you retrieve the scanned QR code? The simplest solution for Zebra devices is to use the DataWedge application, which is usually pre-installed (although you can always download it from Google Play).
Once you have linked the DataWedge app to your app and configured it properly, you can extract the scanned QR code from the Intent's Bundle by capturing an Intent. The integration process follows these steps.
Configure DataWedge
When you open the application, you'll see this screen:
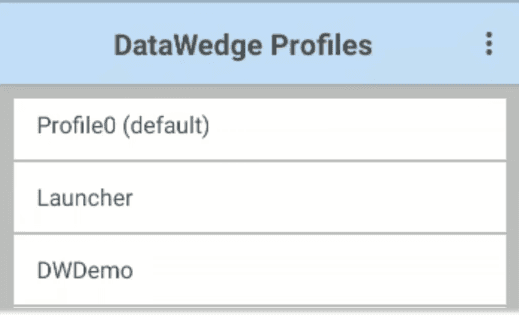
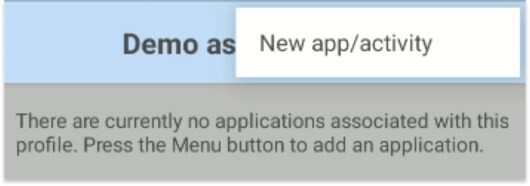
Here you'll see different profiles. You'll also need a profile like this. You can either copy one of the existing profiles or create a new one.
For this example, we'll create a new one.
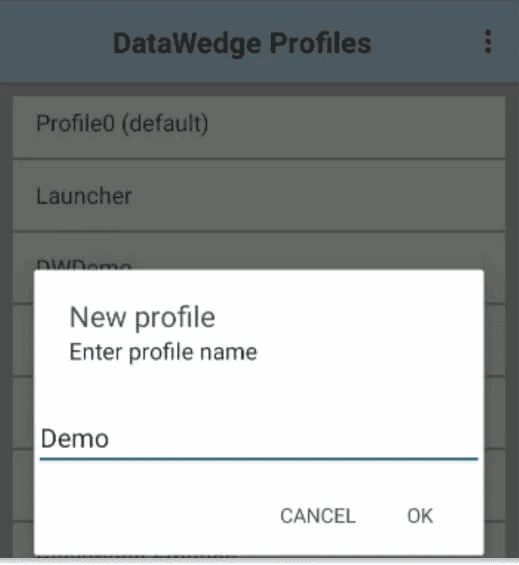
Once you have created the new profile, open it.
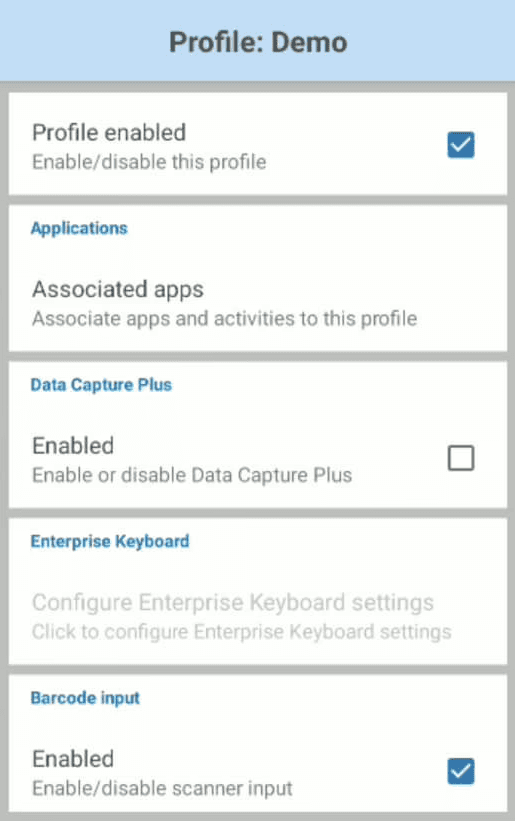
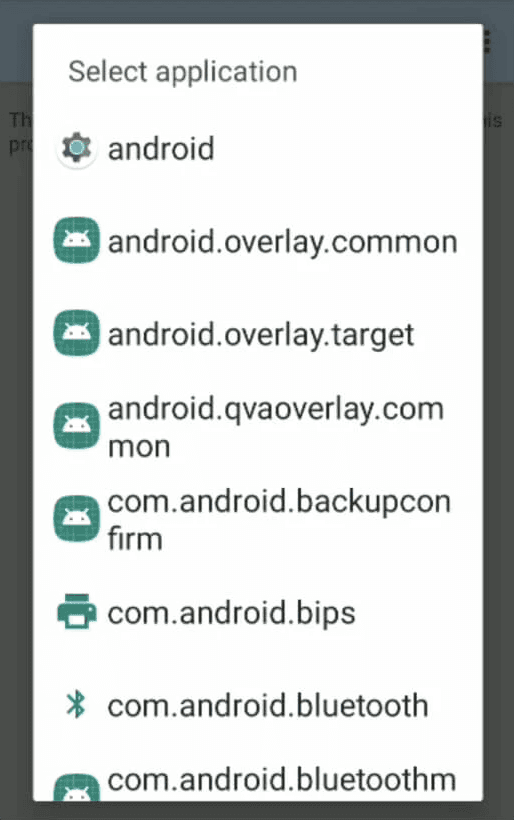
Your first task here is to associate it with your application. Open the 'Associated Applications' menu. Then, after selecting the 'New app/activity' option, find the activity in the list where you want to capture the scanned QR code.
Once done, navigate back and scroll down to the 'Intent output' section. Set the following configurations:

First and foremost, enable the 'Enabled' flag. Then specify the intent action, which in this example is com.demo.app.myActionName.ACTION. You'll add this to the activity in the manifest file as an intent filter.
If you want to associate multiple activities with DataWedge, you'll need to create a new profile and intent action for each one. However, if your application is built on a multi-fragment architecture - which is quite common these days - this won't be necessary.
It's also worth noting that there is an option to send a broadcast intent.
Once you've done the above, let's have a look at your codebase.
Changes to the codebase
Your first task in the manifest is to add the intent filter to the activity.
Be careful not to mistype the action and make sure that you are applying the intent filter to the same activity as specified in DataWedge.
After that, all you need to do is capture the intent.
As shown in the code snippet above, the addition of the onNewIntent() method is required to retrieve the QR code in the extra string from the received intent.
The other strings seen in the DataWedgeHelper are used to start and stop reading the QR code via the intent, as shown below.
As you can see, there wasn't a lot of code to write for the integration. The main focus is to ensure that the profile configuration is set correctly in DataWedge.